Introduction
Journey Mapping for Jira enables you to write down your user or customer journeys within Jira and connect them to your work items.

After installation, you will find a new sidebar item named "Journey Mapping", available to all users that have "Edit Issue" permissions within the project.
This permission is needed because when associating issues with the journey map, the user needs to be able to edit the issue.
Overview#
Journey Mapping App enables you to
add an unlimited number of journey maps via the Overview page.
You can also search for them by name.
You can also switch between Card view and List view here.
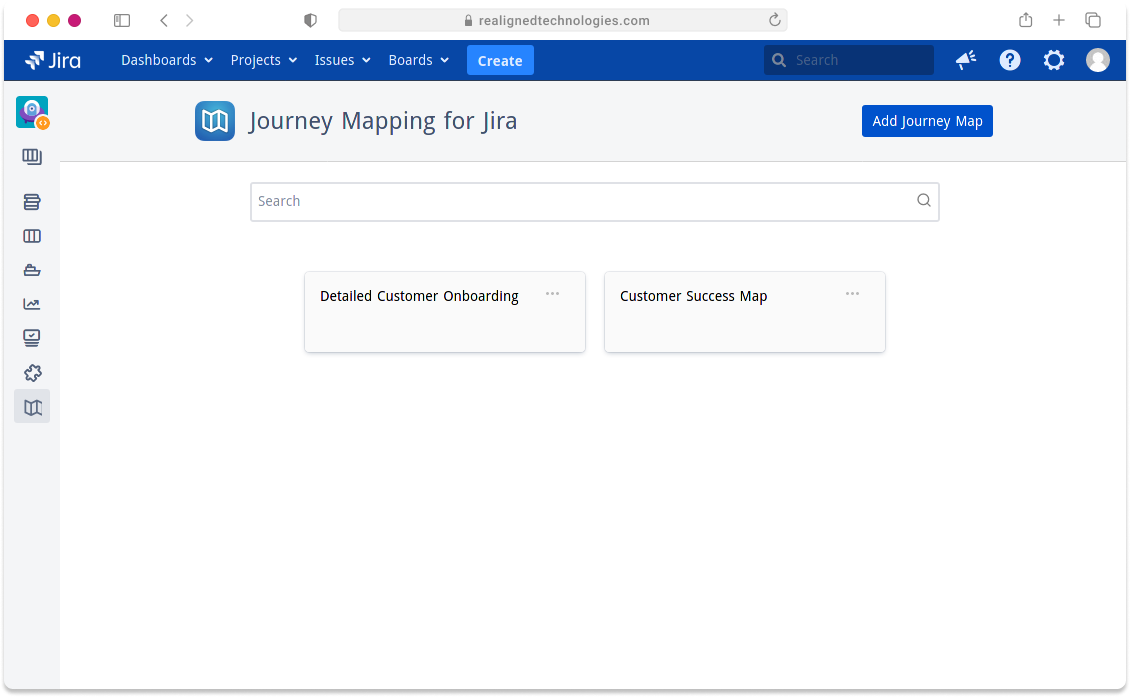
By clicking on the journey map, you will be redirected to the editing canvas.
Editing#
Here, start with a rough outline of your user's journey map - then, go over it and put in more details over time.
You can edit individual steps by double clicking on them - and you can also re-arrange them by dragging and dropping them. So don't worry when the journey map isn't perfect from the start, you can always go back and amend it.
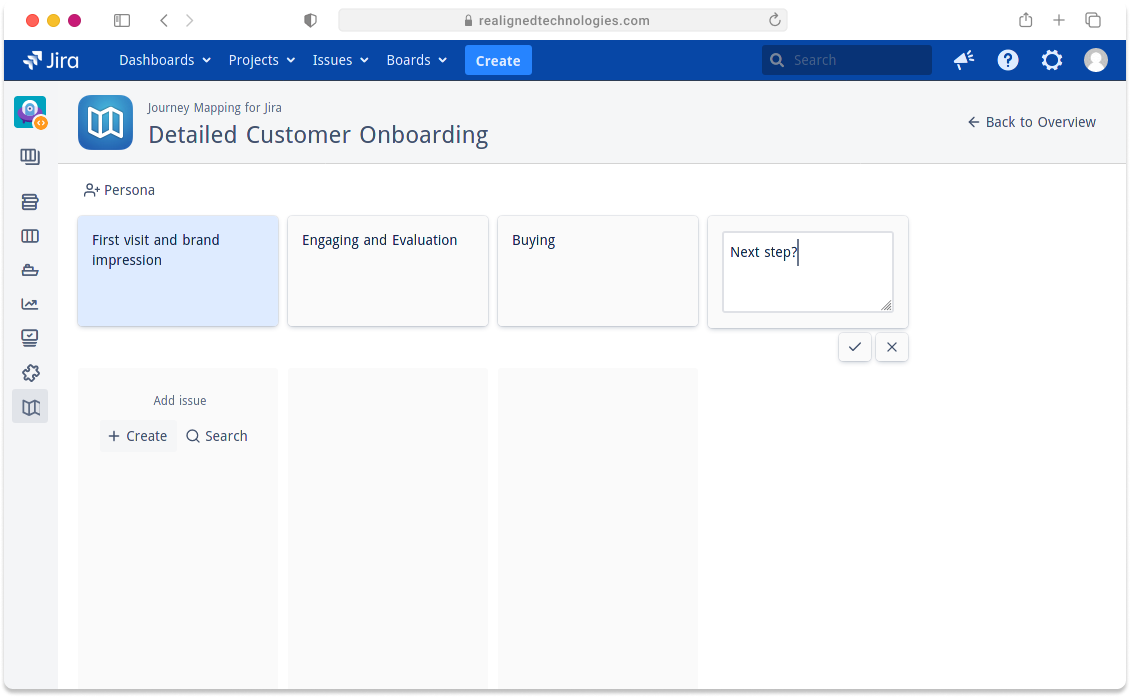
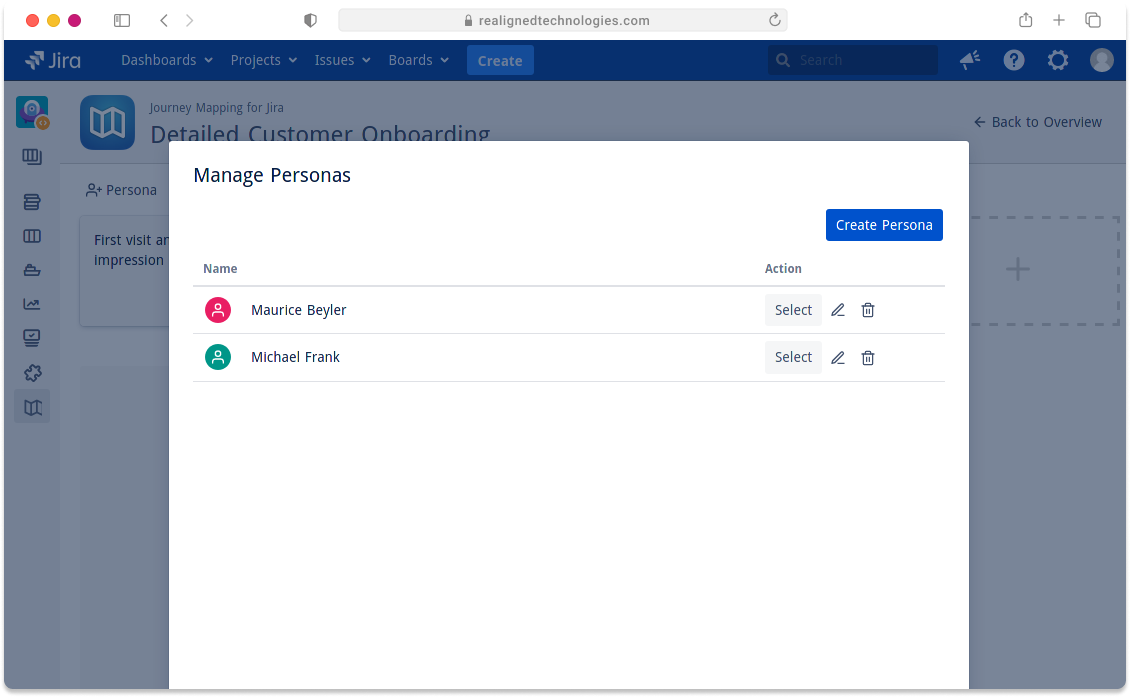
When clicking the persona button, you can select an existing persona and associate it with the journey map, or create a new one.
More Information#
For a step-by-step guide, read the example, which leads you through the creation process of a journey map.